
TL;DR
The problem
Recently, I have been going to the gym several times a week, and I was advised to try to follow a high-protein diet. Since I have no knowledge about nutrition and I am a coder, this gives me an opportunity to build a new app.
Features
- As a user, I would like to search recipes based on my preference (high protein, vegan, etc)
- As a use,r I would like to save some recipes for later
Services and technologies
- Database: AWS DynamoDB
- Accessing the data: AWS AppSync
- Managing backend stack: SST
- Recipe - Food - Nutrition API
- Unified solution for communicating with the different APIs: WunderGraph
- Client: Next.js
Prerequisites
Coding
Getting started
RapidApi provides a UI to test the endpoints. (You can also grab your key from there.) After a couple of experiments, I decided to use the “Search Recipes” endpoint and the “Get Recipe Information” endpoint. My point now is to have a minimum working solution. Feel free to use other endpoints with more options.
To consume the RapidApi I will use WunderGraph.
- It provides a type safe way to interact with the api
- and a unified platform where I will be able to wire other services as well (which will be interesting later).
Setup WunderGraph
-
Next.js template is perfect to start our project:
npx create-wundergraph-app diet-planner -E nextjs -
Replace template code with ours
The template code includes an introspection for SpaceX GraphQL. Since the RapidApi is built on REST, we need to configure it differently.
Replace the spaceX configuration with the below in the wundergraph.config.ts file.
const food = introspect.openApi({
  apiNamespace: 'food',
  source: {
    kind: 'file',
    filePath: './food-nutrition.yaml'
  },
  headers: builder =>
    builder.addStaticHeader('X-RapidAPI-Key', new EnvironmentVariable('RAPID_API_KEY'))
    .addStaticHeader('X-RapidAPI-Host', 'spoonacular-recipe-food-nutrition-v1.p.rapidapi.com'),
})-
Update the
configureWunderGraphApplicationfunction’sapiproperty. -
As you might noticed there is an environment variable in the header section of the config so create a .env file and add your
RAPID_API_KEY. The configured header will be added to each call. -
Specify the search endpoint with Open Api standards. At this point we are aiming for the minimum.
openapi: 3.0.0
info:
  title: food
  version: '1.0'
servers:
  - url: 'https://spoonacular-recipe-food-nutrition-v1.p.rapidapi.com'
paths:
  '/recipes/complexSearch':
    parameters:
      - schema:
          type: string
        name: query
        in: query
        required: true
    get:
      summary: Your GET endpoint
      tags: []
      responses:
        '200':
          description: OK
          content:
            application/json:
              schema:
                type: object
                properties:
                  results:
                    type: array
                    items:
                      $ref: '#/components/schemas/Recipe'
      operationId: searchRecipes
components:
  schemas:
    Recipe:
      title: Recipe
      type: object
      properties:
        id:
          type: number
        title:
          type: string
So far only one request parameter is mapped and the result object is neither complete. Only id and title are returned.
As a last step a GraphQL query must be created in the Operations folder. Don’t forget to pass the parameter!
query Recipes($query: String!) {
  food_searchRecipes(query: $query) {
    results {
      id
      title
    }
  }
}
The referenced query’s name is concatenated from two parts:
- food comes from the base configuration (how we named the api)
- searchRecipes comes from the yaml file’s operationId property.
The query can be tested on this url.
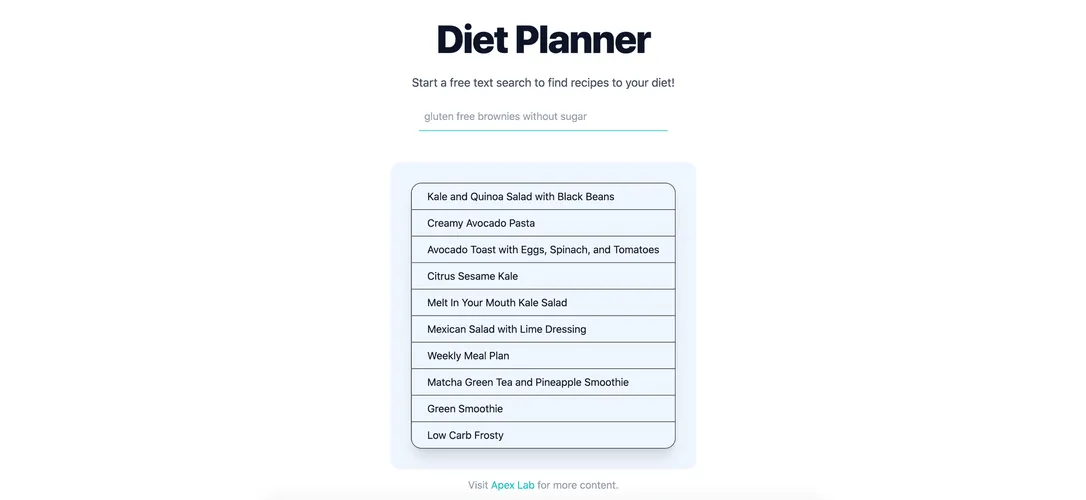
A little frontend
At this point I would like to just list the search results. I have reused what I could from the original template. Again, create something nicer if you’d like. An important change I have made is in the useQuery hook. There is a query state variable which passed to the query. The query parameter is bind to the input.
const [query, setQuery] = useState('')
const recipes = useQuery({
  operationName: 'Recipes',
  input: {
    query,
  }
})
Thanks to the WunderGraph setup now we have autocomplete on the paramater. With one parameter, it is not much, but imagine it with 10+ items.
Get recipe's information
Since the search endpoint provides only a few information about a recipe, somehow, the details should be retrieved. There is a “get by id” endpoint for this purpose. It is worth testing the endpoint again on the UI first.
Based on the other endpoint the new endpoint configuration should look like this:
'/recipes/{id}/information':
  parameters:
    - schema:
        type: string
      name: id
      in: path
      required: true
  get:
    summary: get info endpoint
    tags: []
    responses:
      '200':
        description: OK
        content:
          application/json:
            schema:
              $ref: '#/components/schemas/Recipe'
    operationId: getRecipe
A property was added to the Recipe component as well:
Instructions:
  type: string
And the associated query:
query Recipe($id: String!) {
  food_getRecipe(id: $id) {
    id
    title
    instructions
  }
}
The query can be tested on this url.
Recipe’s details page

- Add linking to the index.tsx. Each listed element should navigate to the /{id} route
- Create details page: [id].tsx
- Copy everything that we can from the index page
- Show the title and the instructions for the current recipe
Save and retrieve the recipes we like
A simple GraphQL API can be created in minutes with the help of SST. The goal is to be able to save recipes and later retrieve them.
- Start with a template:
npx create-sst@latest --template=minimal/typescript-starter diet-planner-backend- Followed this guide to create a table for recipes.
StorageStack.ts
import { StackContext, Table } from '@serverless-stack/resources'

export function StorageStack({ stack }: StackContext) {
  // Create the DynamoDB table
  const table = new Table(stack, 'Recipes', {
    fields: {
      recipeId: 'string',
    },
    primaryIndex: { partitionKey: 'recipeId' },
  })

  return {
    table,
  }
}-
Used this guide for api creation
-
My project structure a bit different:
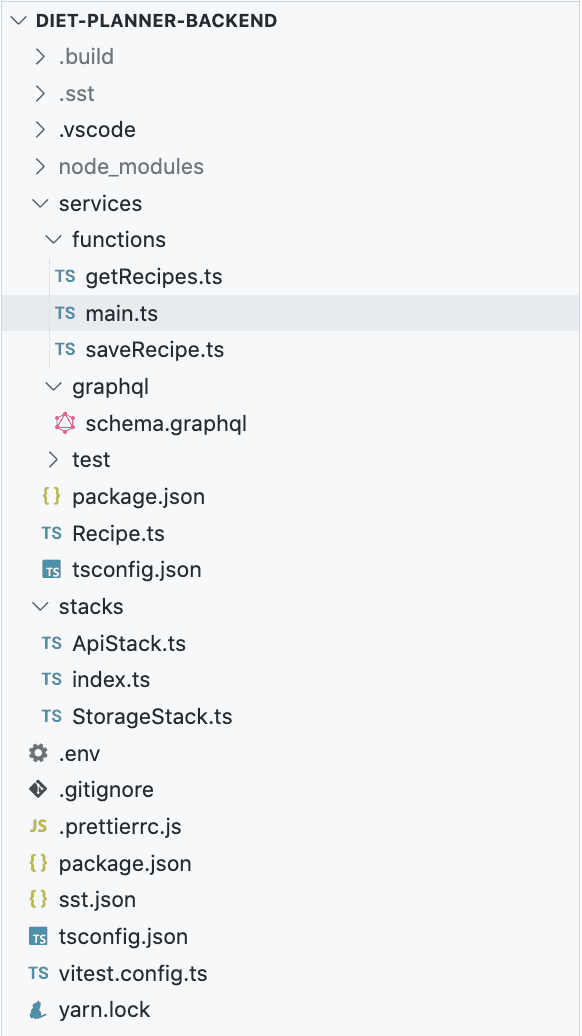
5. And I renamed lambda.ts to main.ts 6. Also I have faced an issue as the top level schema is required for AWS so schema file should start with:
schema {
  query:Query
  mutation: Mutation
}
ApiStack.ts
import { AppSyncApi, StackContext, use } from '@serverless-stack/resources'
import { StorageStack } from './StorageStack'

export function ApiStack({ stack }: StackContext) {
  const { table } = use(StorageStack)

  // Create the API
  const api = new AppSyncApi(stack, 'Api', {
    schema: 'services/graphql/schema.graphql',
    defaults: {
      function: {
        bind: [table],
      },
    },
    dataSources: {
      recipes: 'functions/main.handler',
    },
    resolvers: {
      'Query getRecipes': 'recipes',
      'Mutation saveRecipe': 'recipes',
    },
  })

  // Show the API endpoint in the output
  stack.addOutputs({
    ApiId: api.apiId,
    ApiKey: api.cdk.graphqlApi.apiKey ?? '',
    APiUrl: api.url,
  })

  // Return the API resource
  return {
    api,
  }
}
schema.graphql
schema {
  query:Query
  mutation: Mutation
}

type Recipe {
  recipeId: ID!
  title: String!
  instructions: String!
}

input RecipeInput {
  recipeId: ID!
  title: String!
  instructions: String!
}

type Query {
  getRecipes: [Recipe]
}

type Mutation {
  saveRecipe(recipe: RecipeInput!): Recipe
}
Recipe.ts
type Recipe = {
  recipeId: string;
  title: string;
  instructions: string;
};

export default Recipe;
getRecipes.ts
import { DynamoDB } from 'aws-sdk'
import { Table } from '@serverless-stack/node/table'

const dynamoDb = new DynamoDB.DocumentClient()

export default async function getRecipes(): Promise<Record<string, unknown>[] | undefined> {
  const params = {
    TableName: Table.Recipes.tableName,
  }

  const data = await dynamoDb.scan(params).promise()

  return data.Items
}
saveRecipe.ts
import { DynamoDB } from 'aws-sdk'
import { Table } from '@serverless-stack/node/table'
import Recipe from '../Recipe'

const dynamoDb = new DynamoDB.DocumentClient()

export default async function createNote(recipe: Recipe): Promise<Recipe> {
  const params = {
    Item: recipe as Record<string, unknown>,
    TableName: Table.Recipes.tableName,
  }

  await dynamoDb.put(params).promise()

  return recipe
}
main.ts
import Recipe from '../Recipe'
import saveRecipe from './saveRecipe'
import getRecipes from './getRecipes'

type AppSyncEvent = {
  info: {
    fieldName: string
  }
  arguments: {
    recipe: Recipe
  }
}

export async function handler(
  event: AppSyncEvent
): Promise<Record<string, unknown>[] | Recipe | string | null | undefined> {
  switch (event.info.fieldName) {
    case 'saveRecipe':
      return await saveRecipe(event.arguments.recipe)
    case 'getRecipes':
      return await getRecipes()
    default:
      return null
  }
}
And finally my index.tsx in stacks folder:
import { App } from '@serverless-stack/resources'
import { StorageStack } from './StorageStack'
import { ApiStack } from './ApiStack'
import { RemovalPolicy } from 'aws-cdk-lib'
export default function main(app: App) {
app.setDefaultFunctionProps({
runtime: 'nodejs16.x',
srcPath: 'services',
bundle: {
format: 'esm',
},
})
if (app.stage !== 'prod') {
app.setDefaultRemovalPolicy(RemovalPolicy.DESTROY)
}
app.stack(StorageStack).stack(ApiStack)
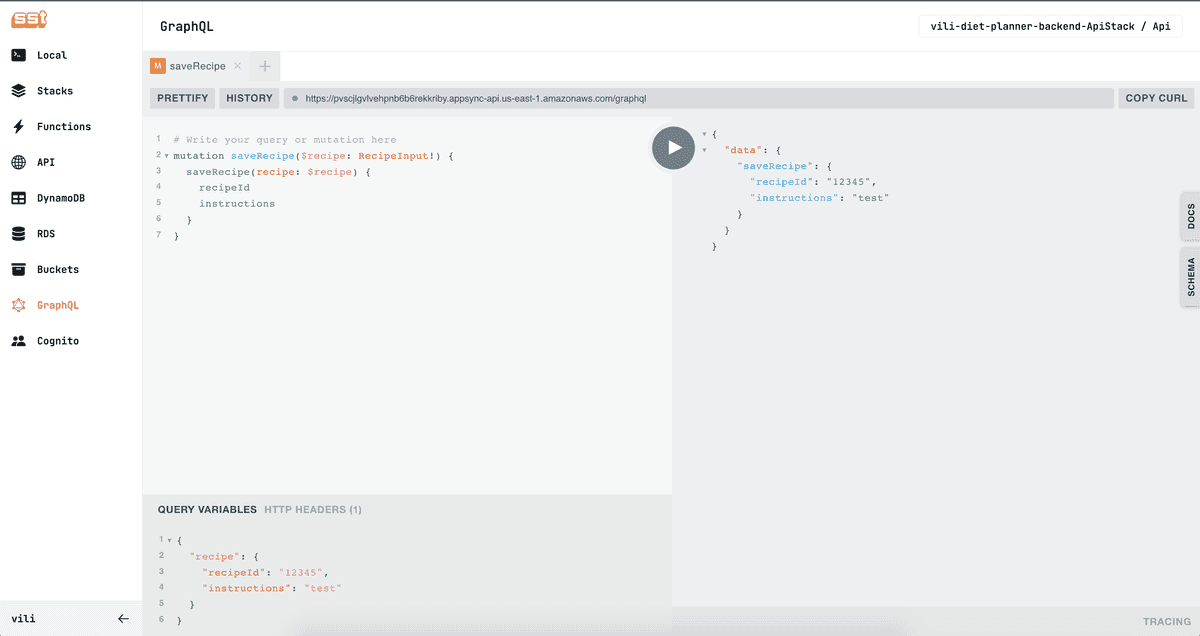
}Our stack can be tested in SST Console:
yarn start- Open SST Console (link is in the terminal where
yarn startwas used) - Create item
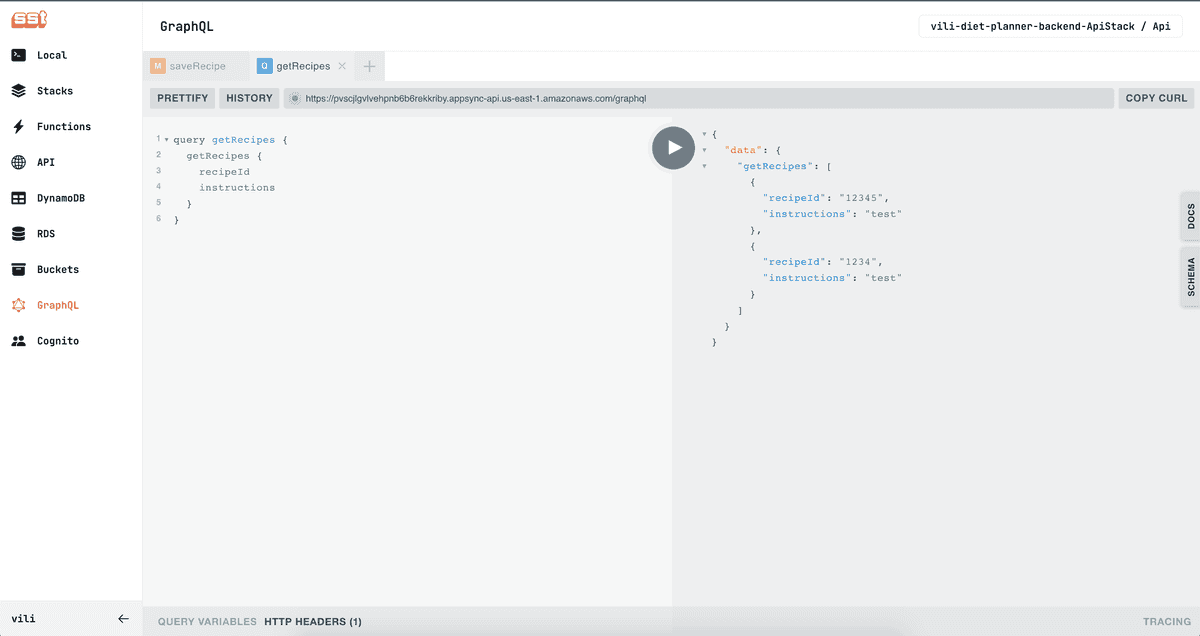
4. Retrieve items
Wire the backend into WunderGraph
- Extend the configuration with introspecting the new GraphQL API
const dietplanner = introspect.graphql({
  apiNamespace: 'dietplanner',
  url: new EnvironmentVariable('DIET_PLANNER_BE_URL'),
  headers: (builder: IHeadersBuilder) =>
    builder.addStaticHeader('x-api-key', new EnvironmentVariable('DIET_PLANNER_BE_KEY')),
})

configureWunderGraphApplication({
  apis: [food, dietplanner],
...- Add new environment variables, both can be copied from the terminal where the stack is running.

- Add new operations
query MyRecipes {
  dietplanner_getRecipes {
    recipeId
    title
    instructions
  }
}

mutation SaveRecipe($recipe: dietplanner_RecipeInput!) {
  dietplanner_saveRecipe(recipe: $recipe) {
    recipeId
    title
    instructions
  }
}
In the logs you should see these lines:
2022-12-04T14:51:23+01:00 DEBUG: Registered (3) query operations {"component":"@wundergraph/server"}
2022-12-04T14:51:23+01:00 DEBUG: Registered (1) mutation operations {"component":"@wundergraph/server"}
Finish the frontend
- Add a button to the details page
- Use the mutation
const { trigger } = useMutation({
  operationName: 'SaveRecipe',
})- Call it on click
const onSaveClick = () => {
  const { food_getRecipe } = recipe.data
  if (food_getRecipe) {
    const { id, title, instructions } = food_getRecipe
    trigger({
      recipe: {
        recipeId: String(id),
        title,
        instructions,
      },
    })
  }
}
If you would continue
- list my recipes
- error handling
- save more properties
